Here you will find:
- How to build your contact list
- How to build and edit the content of your campaign
- How to test and send your campaign successfully
How to build your contact list
Before sending your first campaign, you must have at least one active list with at least one valid recipient.
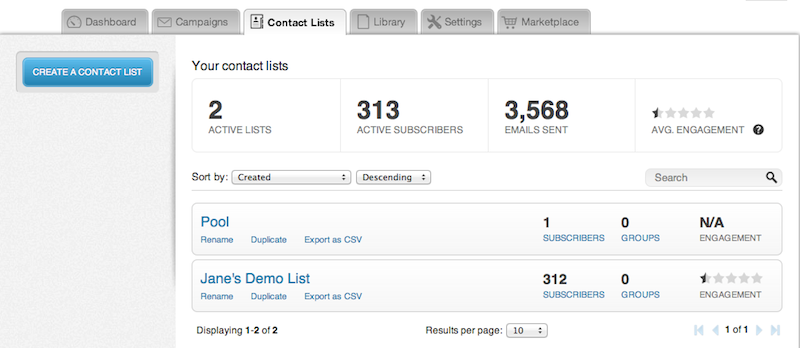
The Contact Lists tab will show you the number of active lists, subscribers, the number of emails sent and the engagement percentage.
To create a new contact list, click on the Create Contact List button on the left.
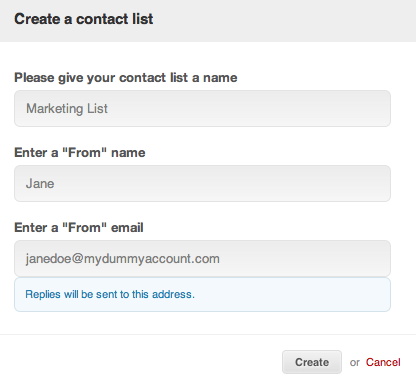
This will open a pop-up window where you can give your contact list a name, specify a Sender Name (who the users will see the emails are coming from) and a Sender Email (also your reply-to email address). Click on Create to complete the process.
To add recipients to your new list
Immediately after the creation of your list you can start adding contacts by clicking on Add contacts on the left hand menu.
You will be asked to confirm that you have permission from the recipient(s) to add them to your list. It is important that you understand Email Marketer abides by anti-spam laws and we do not tolerate any form of spamming.
Click on the checkbox and go to the next step.
If you already have a CSV with your contacts ready, select the From a CSV File option from the ones listed available.
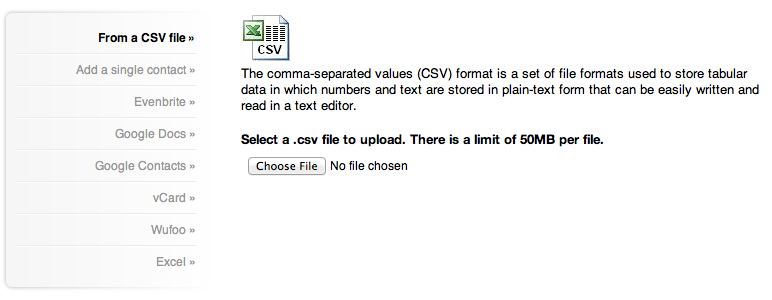
Click on Choose File to browse your computer.
You will be alerted once the process is complete. Once it is done, you will be able to see your new contacts under the active subscribers list. You can also import your contacts from other third-party software.
How to build and edit the content of your campaign
Once your list is ready, you can begin creating your campaign!
To create a new campaign go to the Campaigns tab and click on Create New Campaign on the left hand menu.
You have four options to choose from (free or trial accounts have only three):
- Regular campaign - A campaign such as an announcement or notice
- Auto-responder - An automated email that is sent for a one-time event like subscribing to a list or based on a date field in a contact list
- Recurring campaign - A campaign that is triggered to run at regular, specified intervals, like a Happy Birthday message
- A/B split test - A campaign that allows you to test two different Sender Names / Sender Emails, subject lines, or unique email content
Give your campaign a name and select the list you will send it to. Depending on the type of campaign you chose to create, the information below will vary slightly. For this example we will use a Regular campaign.
Under The recipients you will have a full view of all your contact lists, along with details such as how many recipients each list has, when it was created, and if it contains any groups.

In the next step, you'll enter additional campaign details.
Enter your campaign's subject (this will appear as the subject line in your recipients inboxes), the sender's name and email address, and if there is an alternate reply-to email (this is useful in case recipients wish to contact someone directly).
Advanced options are available for experienced users - these include enabling/disabling tracking clicks, opens, and adding third-party tracking mechanisms like Google Analytics.
Selecting a template
Now you can start building your content!
Start by selecting one of our default templates, or if you wish, upload your own template ZIP file or copy-paste your HTML code.
-
If you choose to upload your own code, you will continue to a basic CKEDITOR that will allow you to edit your content.
-
If you choose to use our own Optimized Templates, you can use the Email Campaign Builder.
Using the Email Campaign Builder
The Email Campaign Builder allows you to add and remove sections from your email with ease, set a color scheme, edit plain-text, use advanced HTML modes, and test your campaign all from a single window. These templates have been specially designed to pass all Premailer and Litmus tests!
Content sections include a variety of components: standalone images, image + text, standalone text or more interactive elements like QR codes, Google Maps and social media elements.
Add
To add a section to your email, click on the thumbnail of the appropriate section. This will automatically add it to the bottom of the email.
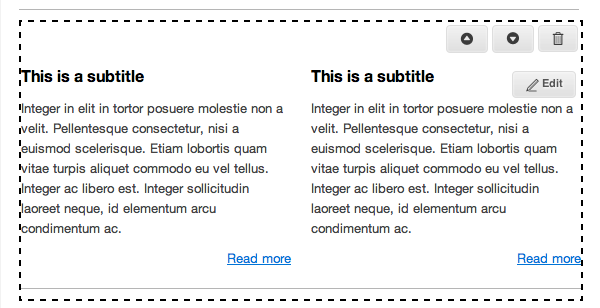
Move/Remove
To reposition or remove a section from your email, hover over the section to prompt the positioning menu. To move a section up or down within the template, simply click the arrows until you reach the desired spot. To remove the section, click on the trash bin icon.
Edit
To edit a section, hover over the area to make the edit button appear. Clicking on it will display the edit menu on the left-hand side. Remember to save your changes!
Finalize your campaign by adding a personal touch, like selecting your own color scheme with the palet available on the left-hand menu.
How to test and send your campaign successfully
Now that your content is ready - it's time to schedule your campaign.
To ensure that you don't run into any problems delivery issues (like email going to spam), make sure you run a Premailer and SpamAssassin test. You can also send yourself a test email so you can see what your recipients will see. All testing options will be available on the left-hand menu of the campaign builder under the category labeled Test your campaign.
Scheduling for later
When you reach the Schedule or Send section of the campaign creation process, you have the option of sending your campaign immediately or scheduling it for later.
If you aren't quite ready to send your campaign right away, you have two calendar years (the current year and the next) to plan the delivery of your campaign. Select a specific time, and click on Schedule.
